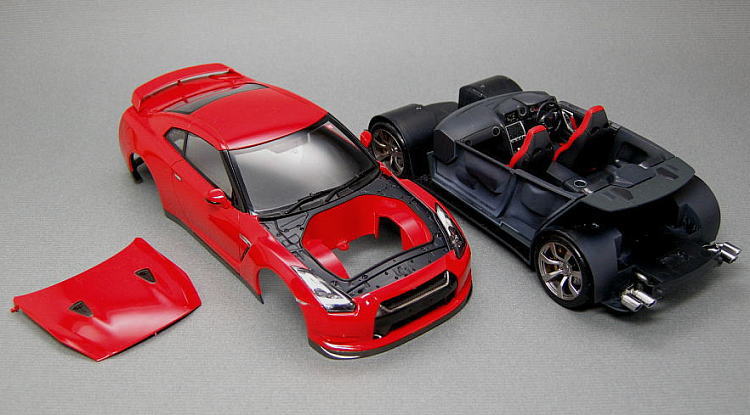
Step 1 : Body and Interior
 Correct the Body
Each parts fit perfectly. They are jointed with dowels like a snap fit
kit.(Of course an adhesive is necessary.)
Trunk lid part have the bumps a little. I made them a uniform surface with
sandpaper.
Painting the Body
Painted the body red. The paint is GSI Creos new color GX3 Hermann Red.
Dashboard
I painted the dashboard. It is appointed only one color of black in instruction.
However, I painted five colors to express a difference of the materials.
Masked and airbrushed the metal frames.
Applied the meters decal. However, the size of meters of decal do not fit
with the mold. I planed the mold with sandpaper, and applied the decal.
The multi function display is not printed on the decal of Fujimi GT-R.
I used it from the decal of Tamiya GT-R.
The dashboard. was completed.
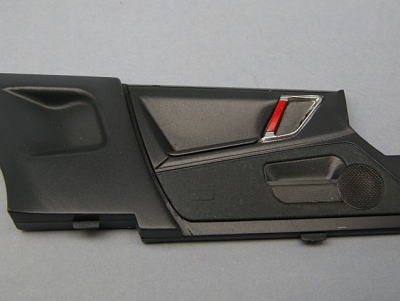
Front Seat and Inner of Door
I reproduced the feel of suede and cloth by sandblasted the dark surface
primer with an airbrush.
Front seats are two-tone color of the red and black. It is the special
color for GT-R black edition.
I used ten colors for the inner of door to reproduced the difference of
materials.
Inner door knob and switch panel.
Rear Seat and Floor Panel
Replicated the feel of floor panel by sandblasted the dark surface primer
with an airbrush.
Masked and airbrushed the metal plate and frames of transmission tunnel.
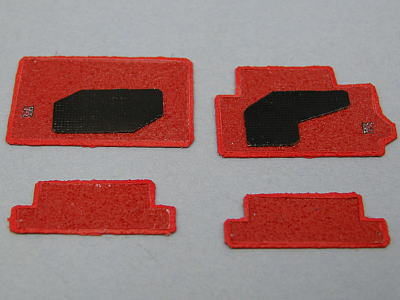
Floor Carpet
Replicated the floor carpets of sandpaper. They are special equipment for
GT-R.
Replicated the GT-R emblem on the carpet too.
Interior was completed
Step 2 : Chassis and Body
Painting the Chassis
The chassis of Fujimi 1/24 GT-R is more detailed than the Tamiya and Aoshima
products. But it is hard to paint because the exhaust system and powertrain
are not separated chassis.
Masked and airbrushed the exhaust system and powertrain. It was very very
hard work...
Painting work is finished.
Brakes System and Suspension System
The brake disk is constructed of two parts, and replicated the
ventilation system. Brake caliper is separated with brake disk, and the
wheel turns with it same as real car.
Assembled the front suspension system.
Assembled the rear suspension system and exhaust system.
Applied the carbon decal from Modelers to the rear bottom cowling, and
coated the clear paint.
Replicated the dark chrome wheel color by coated smoke paint on the silver
paint. The Nissan logo of the center cap is not printed on decal. I applied
the decal of the Tamiya GT-R.
As for the tire, Bridgestone POTENZA RE 701R is Replicated.
Panted the Body 2
Coated the urethane clear paint on the red paint, and polishing with a
compound after harden. It became well-polished body!
Masked and airbrushed the pillars and front grill etc...
Painted the carbon pattern on the front grill, and put the metallic frame
sticker.
The mold of doorknob isn't sharp. I masked the outline and pained silver
paint.
Windshield
The instruction is wrong about the black frame area of windshield. I painted
it unawares... OMG! The sunshade is black, too.
I revised the mistake area. The sunshade became smoke color.
Headlight
There are some parts of the headlight. It is more detailed than the Tamiya
and Aoshima products.
Assembled the headlight.
Emblems
The "GT-R" emblem is the metallic sticker and only red paint
in "R" logo is the decal.
"GT-R" logo is molded to this plating part. However, it does
not fit the logo decal to put on the top.
Sandpapered the logo mold, applied decal, and coat the clear paint. I feel
fine at this one.
Backside of the Body
Put the grill mesh and radiator parts.
The tail lights of this kit do not have reflector parts. I put aluminum
tape instead.
Completed
Fujimi 1/24 GT-R is completion when the chassis is joined to the body afterward.
Via: h3.dion.ne.jp
http://nissanskylinegt-rr35.blogspot.com/